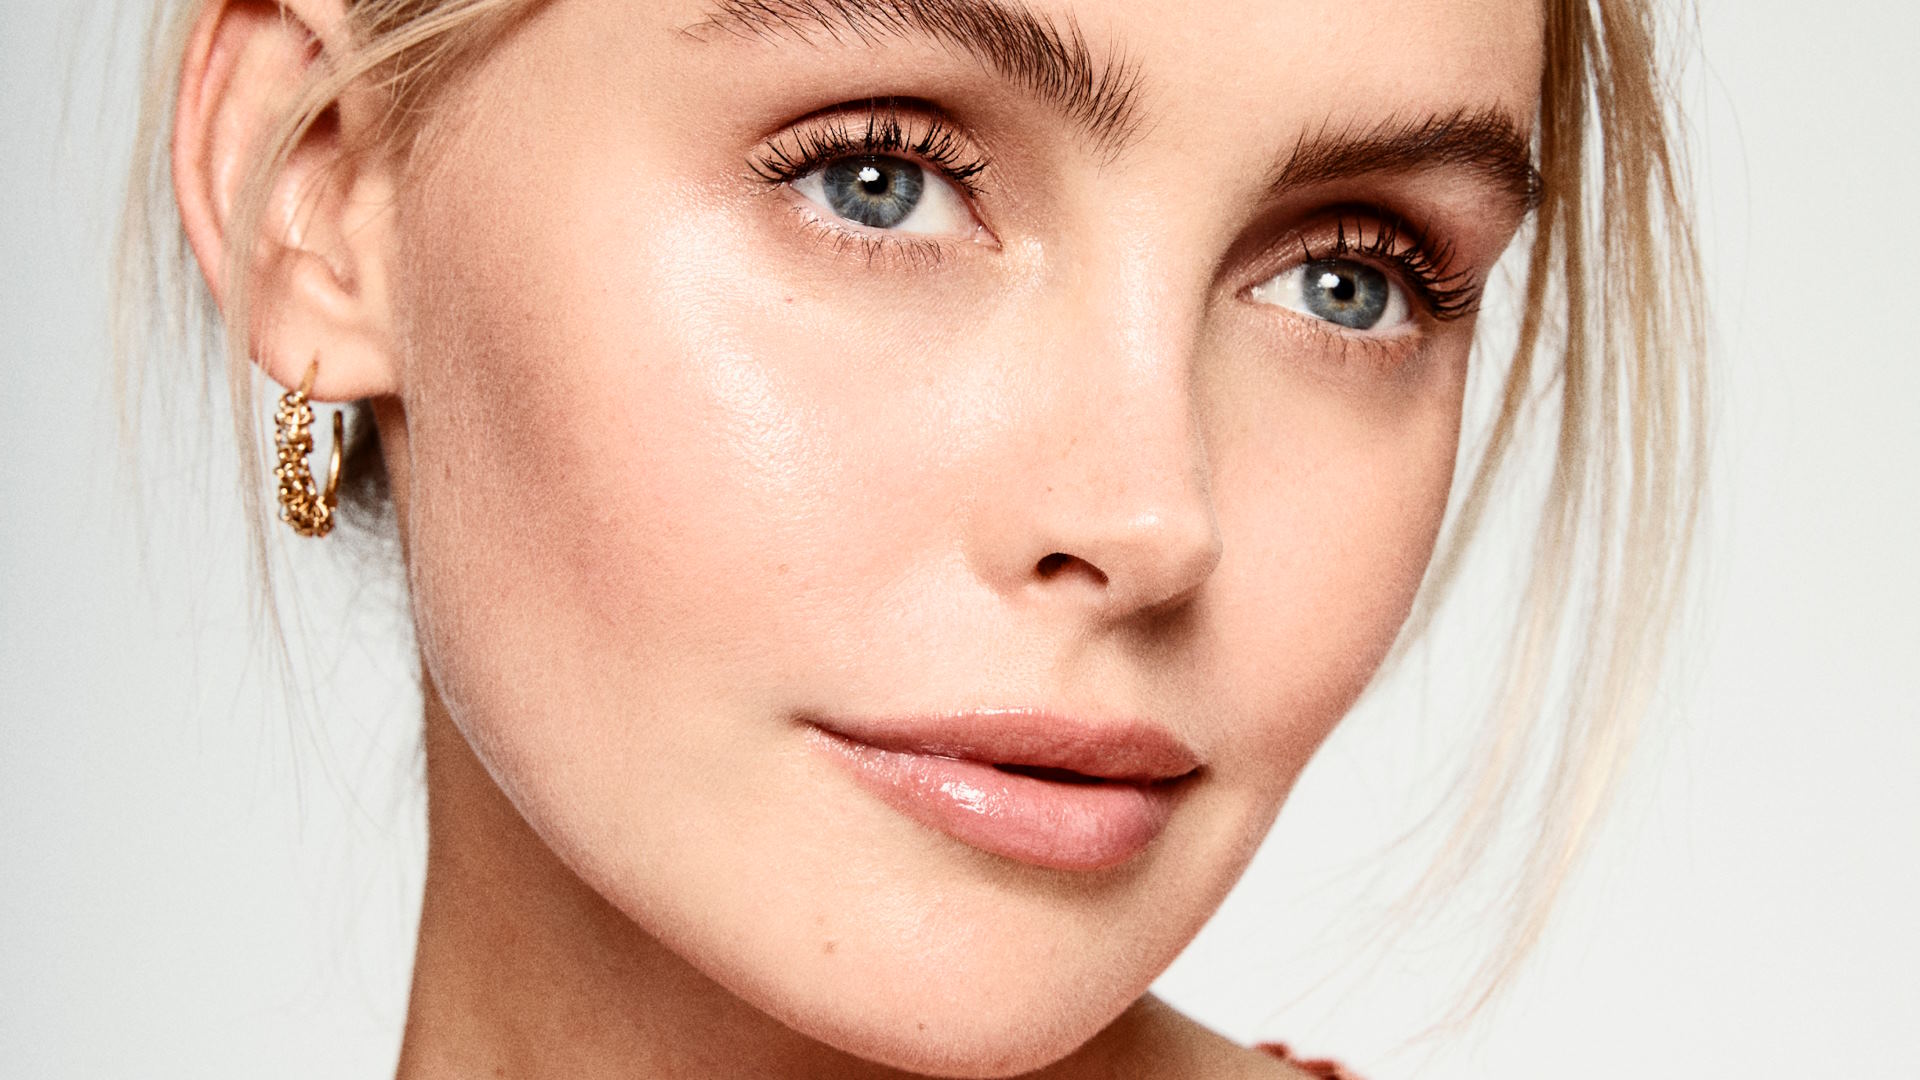
Ever wish you could step out the door looking effortlessly radiant, like you’ve just rolled out of bed with perfect skin? That’s the magic of the no-makeup makeup look! It’s all about enhancing your natural beauty without layers of products. Imagine it as a soft whisper of makeup instead of a shout. You might be wondering, “How do I pull off this look without overdoing it?” Don’t worry—we’ll walk you through each step, so you’ll be glowing in no time without looking like you’ve spent hours in front of the mirror.
Step 1: Prepping Your Skin
Before diving into makeup, let’s talk about prepping your skin. Think of your skin as a canvas; the better the canvas, the more beautiful the painting. When your skin is clean and moisturized, your makeup will look fresher and last longer. Here’s how to get your skin ready:
- Cleanse: Start with a gentle cleanser to remove any dirt or oil. This helps prevent breakouts and ensures a smooth application.
- Tone: Use a toner to balance your skin’s pH. This step can help tighten pores and refresh your complexion.
- Moisturize: Apply a lightweight moisturizer that suits your skin type. Hydrated skin looks healthy and radiant!
- Primer (Optional): If you want your makeup to last even longer, consider applying a primer. This creates a smooth base for your foundation.
Taking a few minutes to prep your skin can make a world of difference in how your makeup looks and feels throughout the day. Just like a painter wouldn’t use a dirty canvas, you shouldn’t skip this step!

Step 2: Light Coverage Foundation or Tinted Moisturizer
Now that your skin is prepped, it’s time to move on to the foundation. The key here is to keep it light! Think of a tinted moisturizer or a light coverage foundation as a gentle hug for your skin—not heavy and suffocating, but comforting and supportive.
- Choosing the Right Product: Look for foundations labeled as “sheer” or “lightweight.” Tinted moisturizers are also great options as they provide hydration while evening out your skin tone.
- Application Tips: Use a damp makeup sponge or your fingers to apply the product. This technique allows the foundation to blend seamlessly into your skin, creating a natural finish.
- Concealing: If you have any blemishes or dark circles, you can spot-conceal these areas with a lightweight concealer. Just dab a tiny amount and blend it gently. Remember, we’re aiming for a fresh-faced look!
This step is all about creating a natural base that lets your skin breathe. The goal is to even out your complexion while still allowing your natural skin to peek through.
Step 3: Natural Brows
Next up, let’s define those brows! Your eyebrows frame your face, so keeping them looking polished but natural is essential for this look.
- Fill Them In: Use a brow gel or a pencil that matches your natural brow color. Lightly fill in any sparse areas, but don’t go overboard—remember, we want to keep it natural!
- Brush Them Up: Use a spoolie brush to comb through your brows. This helps blend the product and gives a softer, more natural look.
If your brows look too perfect, they can give away the fact that you’re wearing makeup. So, think of your brows as the finishing touch that completes your no-makeup makeup look—just enough to make them stand out without looking overdone.
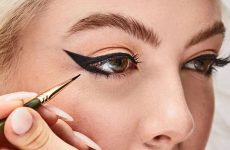
Step 4: Soft Eye Definition
Now that your brows are on point, let’s move on to the eyes. The key to achieving a natural eye look is subtle definition. You want to enhance your eyes without drawing too much attention.
- Eyeshadow (Optional): If you choose to use eyeshadow, stick to neutral shades that are close to your skin tone. A light beige or soft taupe can add just a hint of depth without being overpowering. Apply it to your eyelids with a fluffy brush for a soft wash of color.
- Mascara: This is where you can really open up your eyes. Choose a mascara that adds length and definition without clumping. Apply one or two coats, focusing on the tips of your lashes for a more natural look. If you prefer, you can even curl your lashes first for extra lift!
By keeping your eye makeup minimal, you’ll achieve that wide-eyed, fresh look. Your eyes will sparkle, and you’ll look awake and bright—just like a sunbeam peeking through the clouds!
Step 5: Subtle Glow with Blush and Highlight
After enhancing your eyes, it’s time to add a bit of color to your cheeks. A natural blush can give you that healthy, rosy glow that makes you look vibrant and alive.
- Cream Blush: Opt for a cream blush instead of powder for a more natural finish. Tap a small amount onto the apples of your cheeks and blend it out with your fingers or a sponge. You can also apply a touch on your eyelids for a cohesive look!
- Highlighter: For a gentle glow, apply a cream or liquid highlighter to the high points of your face—your cheekbones, the bridge of your nose, and the cupid’s bow. Just a little bit goes a long way!
This step is like adding the final brushstrokes to a painting. It brings warmth and life to your face, giving you that enviable, healthy glow without being overly dramatic.